Setting up a Blackboard Collaborate Session
Step 1. Using a Chrome browser log into Blackboard and navigate to your course.
Step 2. If your current course (template) does not have a Collaborate menu item, you will need to add one. To add a menu item, click on the + icon at the top of your course menu.
![]()
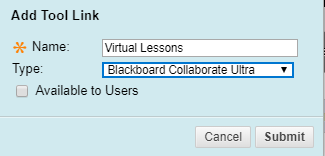
Click on Tool Link. A box will appear: Add Tool Link. Name your link, you can call it Collaborate or something more intuitive such as Virtual Lessons. In the type drop-down, select Blackboard Collaborate Ultra. At this time do not check Available to Users (you can enable when you are ready). Click Submit
Use the arrows to the left of the menu item to drag the menu item to where you want to position it in your course menu (all new items display at the bottom of your menu). For example, move it up to Communication Tools or Course Materials.
Step 3: To create a new session, click on the Collaborate tool link (currently hidden from student view) and click on Create Session.

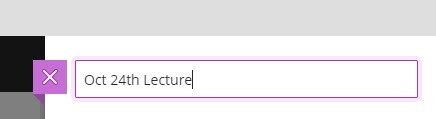
Step 4. Name the session.
Step 5: Event Details include guest access and the start date and time.
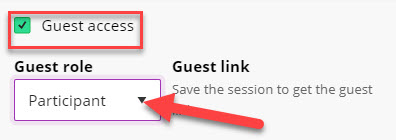
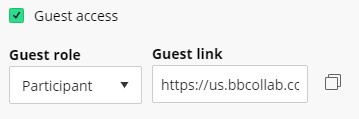
Check the Guest Access box if you wish to obtain a link to share with guests or to post for students in an announcement or email.
If you select the drop-down you can set the guest access to Presenter or Moderator. This is helpful where you have an external guest speaker that will be presenting.

You would only use the Repeat session if you were offering a collaborate session at the same time on a recurring basis.
Caution: the session will end at the exact time inputted for “end time”. We recommend setting the “end time” to 15 minutes after the expected end time of your session (Ex. If the session is 9am-12pm, make the end time 12:15 or 12:30.)
Early Entry: Set this to 15 min before the start time, which gives you and your students time to get logged in and tested before class starts. You can click the drop-down if you wish to customize it.
Optionally you can provide a description of the event. For example, if you have a guest speaker, you could add bio details here.
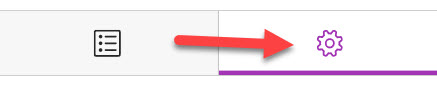
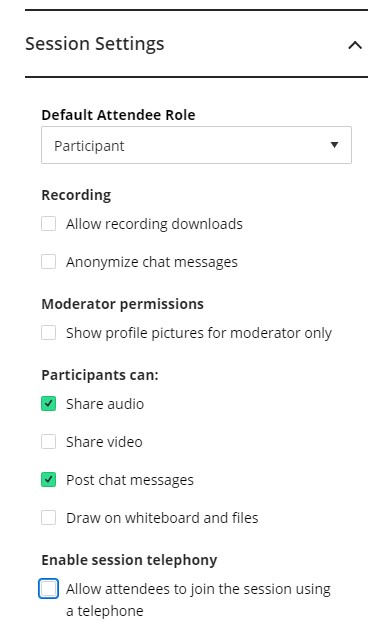
Step 6: Set your session settings.
- Default Attendee Role: can be left to Participant. However, if you want to allow your students to share their screen/presentations during the session you will need to change this to Presenter
- Allow recording downloads: Use Caution. There are disadvantages to enabling “Allow recording downloads” with privacy the main concern. If you enable this, it allows any participants to download and save the recording.
- We recommend that you record the session, and then send the link in the course to your participants as an alternate.
- Anonymize chat messages: Keep disabled.
- Moderator permissions: Allow you to show a profile picture for the moderator (requires you to customize your profile and add a photo).
- Share audio: Keep enabled.
- Share Video: We recommend that you disable Share video if you have a large class as it will require a larger bandwidth which will cause delays in audio transmitting and receiving.
- Post chat messages: keep enabled.
- Draw on whiteboard and file functionality: Use Caution. We recommend disabling the Draw on whiteboard and file functionality. If you leave this enabled it allows any participant to write, draw, and highlight your document while you are presenting. This can lead to distraction to other participants.
- Allow Attendees to join the session using a telephone: This option allows students that do not have internet access or have low bandwidth to join the session through their telephone. This allows them to hear the conversations and ask questions but they will not have access to any visual content such as videos, powerpoints, or other documents. Note: Telephone participation is limited so it is only recommended when absolutely necessary. Participants will also show as anonymous.
Step 7. There is generally no need to enable Private Chat, so leave these settings disabled.
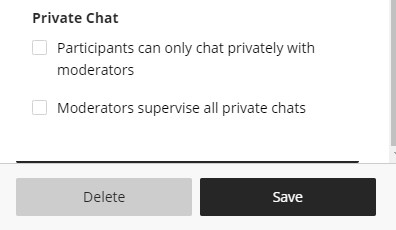
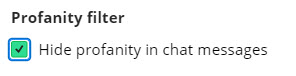
Step 8. Profanity filter – select hide profanity in chat messages
Click on Create.
Your session has been created.
NOTE: You will need to share the link with any guests that do not have access to the Bb course, copy and paste the Guest link and email to your guest, and/or post in your announcements for students.
Note: Students will access and join the session by clicking on the menu link in their course. Remember to make the link available.