Using Breakout Groups in Blackboard Collaborate
Breakout Groups in Blackboard Collaborate
You can use the breakout groups feature when you have less than 250 students/attendees in your session. You can create up to 20 groups. There is no limit to the number of students/attendees you can put in each group. However, we recommend spreading attendees out evenly over your groups.
What can students/attendees do in breakout groups?
Breakout groups are designed for group collaboration. Every student/attendee in the group is a presenter. This means that they can share the whiteboard, files, and applications (share their screen) with the rest of their group.
Step by step instructions:
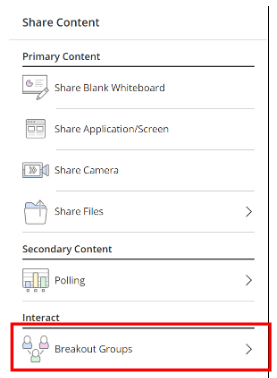
Step 1: Navigate to the Share Content menu and select Breakout Groups.

Step 2: Create the groups:
Breakout groups are assigned during the session. You cannot create them ahead of time or save them (this is true even in recurring sessions).
Breakout groups are temporary structures; once you end breakout groups you will lose the participant lists, the group names and anything that is being shared on screen in the group (for example, whiteboard drawings). Therefore if you want to use the same groups more than once, ask students to return to the main room without ending the breakout groups. They can then go back to them later. If you need to save a list of who was in which group, the best way may be to take a screenshot. There is unfortunately no way of downloading this information.
Create the breakout groups using the Random or Custom assignment.
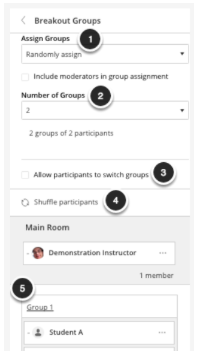
To randomly assign students/attendees to groups:
- Select the Randomly Assign option from the dropdown menu. To include moderators, check the option labeled Include moderators in group assignment.
- Number of Groups: Use the dropdown menu to select the number of groups to create.
- Allow participants to switch groups: Select this option to allow students/attendees to change groups.
- Shuffle Participants: Check this option to change the random group assignment.
- Group assignments will appear here. To rename a group, click on the group name. To reassign participants, drag the participant you wish to reassign between groups.
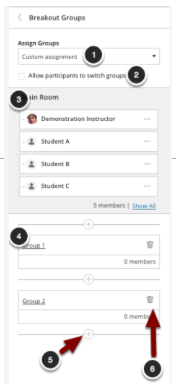
To manually assign participants to groups:
- Select the Custom Assignment button.
- Allow participants to switch groups: Select this option to permit students to change their enrolled group.
- Main Room: Participants in the main room will be listed here. Click Show All to view all participants.
- Groups: Drag participants from the main room to the desired group. Click on the group name to rename the group.
- Add group: Click the + sign to add additional groups.
- Delete group: Click on the trash can icon to delete the group.
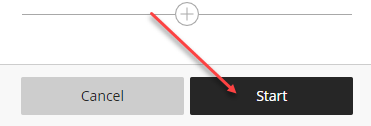
Step 3: When you have the groups prepared, click Start to start the breakouts.
Group chats are private to the group.
The Everyone chat room is open to everyone, no matter what group you are in. Anything posted here will be seen by all groups.
Note: what is said or viewed in a breakout room is not captured in the session recording.
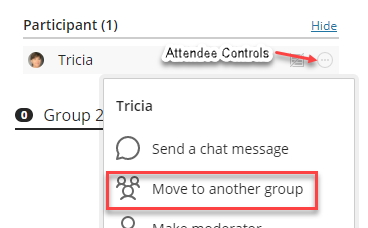
How can I move students to a different group once I have started?
- From the Attendees panel, find the student/attendee and select Attendee controls.
- Select Move to another group. This opens the Breakout groups panel.
- Move the student/attendee to another group. There are two ways you can do this.
- Select the attendee’s options menu and select the group.
- Select the attendee and drag them to the new group.
- Select Update.

How can students self-enroll in their groups?
If students have specific groups that they have been working with or are already assigned to a working group, you can save some time by allowing students to self-enroll to their assigned groups.
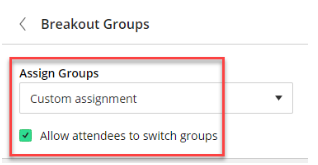
- Choose custom assignment and make sure to allow attendees to switch groups.
- Group 1 and Group 2 are automatically generated. In order to add more groups choose the add icon.
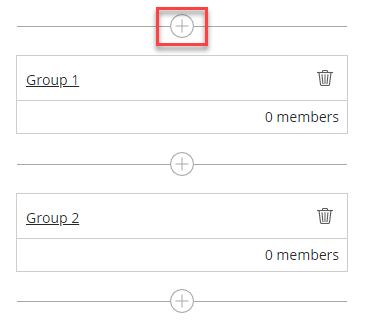
- You can edit the group names but clicking on the name and then changing. This makes sense if the students are working in groups that have a focused topic. Once you are ready, select start.
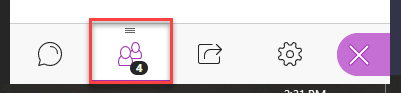
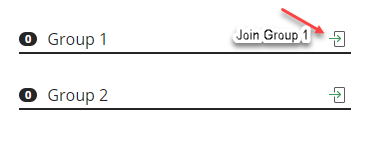
- At this point, everyone will still be in the main room. Students can then choose their group by opening the attendance panel and then clicking on the join icon beside their corresponding group.
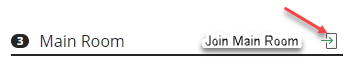
- If students want to leave the group, they can join the main room by clicking on the main room icon.
Can I share files with the breakout groups?
Yes, you can share files, with one or more breakout groups.
- After starting breakout groups, select Share Files.
- Open the File options menu of the file you want to share.
- Select Share with groups.
- Choose the groups you want to share the file with.
- Select Share Now.
The first slide of the file displays in the breakout group.
Can I monitor the groups?
After breakout groups are started you can move between groups to monitor them. If you assigned yourself to a group, you see and hear what others in the group are doing. This includes any shared content, audio, video, and chat.
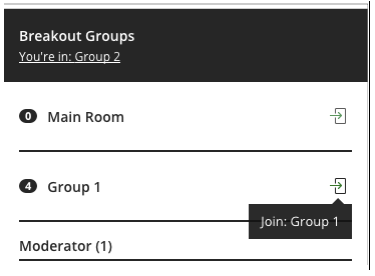
If you want to see how the other groups are doing, you need to join those groups.
From the Attendees panel, select Join group.
Step 4: Advise the breakout groups the session will be ending and save any files:
When you want to stop the breakout group session and bring everybody back to the main room, you should send a chat message as a heads up that the breakout group session will be ending in ___ minutes. This gives them time to take a screen capture, or record in some other way, what they were working on before ending the groups.
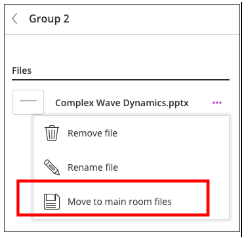
Save files from breakout groups
Find the breakout group files and save them to the main room before logging out of the session.
- After ending breakout groups and before leaving the session, select Share Files.
- Open a group folder.
- Open the File options menu of the file you want to save.
- Select Move to main room files.
The group file is saved to the main room and can be used again.
Note: if you do not save the files any annotations and edits made on the files are cleared when the Collaborate session ends.
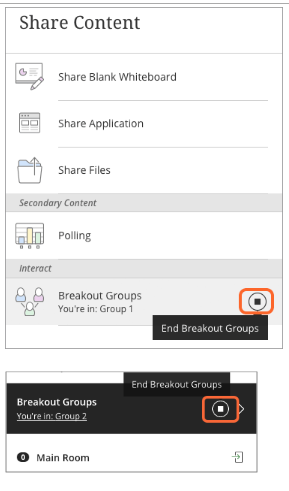
Step 5: Select End breakout groups.
You can find this at the top of the Attendees panel or beside Breakout groups in the Share Content panel. After you select end breakout groups icon, all attendees are moved back to the main room.