To learn more about the pedagogy of using journal assignments, click here.
Creating Journals in Blackboard
How to Create a Journal Assessment in Blackboard
A video tutorial of how to create journals in Bb (2.39 minutes)
Step by Step Instructions:
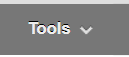
Step 1: Go to or create a content area where students will access your journal, click on the Tools tab.
Step 2: In the drop down, select Journals.
Step 3: Click on Create New Journal.

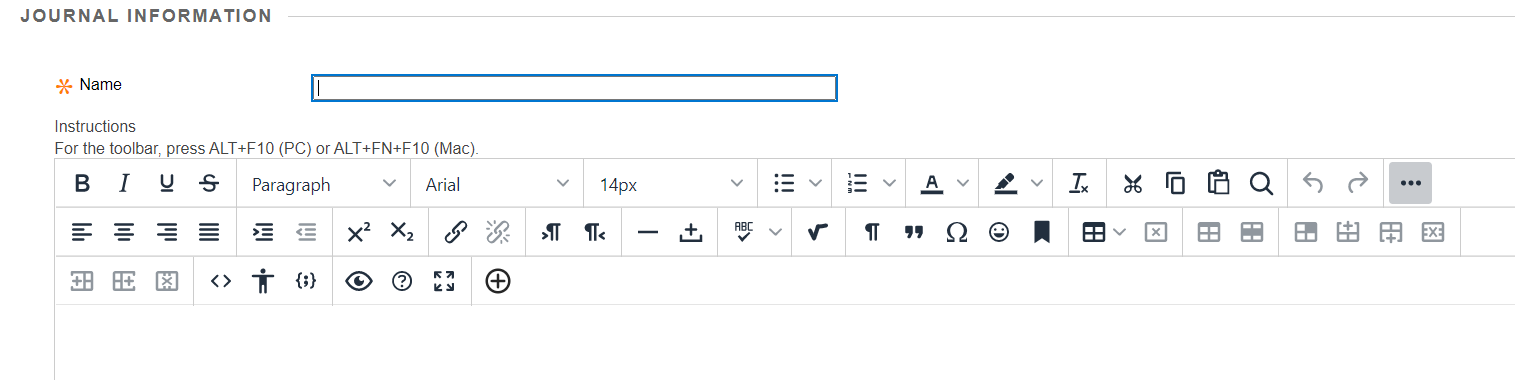
Step 4: Enter a Name and optional instructions and scroll down to customize settings.
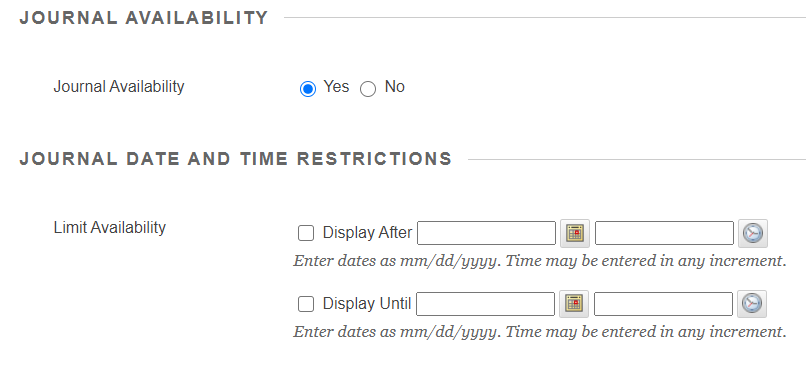
Step 5: Ensure radio button is set to Available. Optionally add date restrictions. Select the Display After and Display Until check boxes to enable the date and time selections. Display restrictions don’t affect the journal availability, only when it appears.
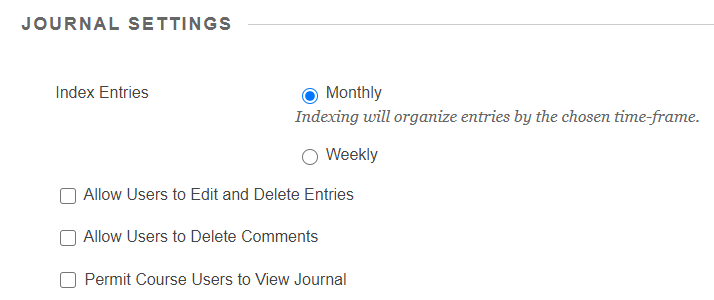
Step 6: In the Journal Settings section, select Monthly or Weekly Index Entries. If you want, you may select check boxes to allow users to edit and delete entries or delete comments.
Optionally, select the check box to Permit Course Users to View Journal. If selected, the journal becomes public. All users can view all journal entries made to the journal topic.
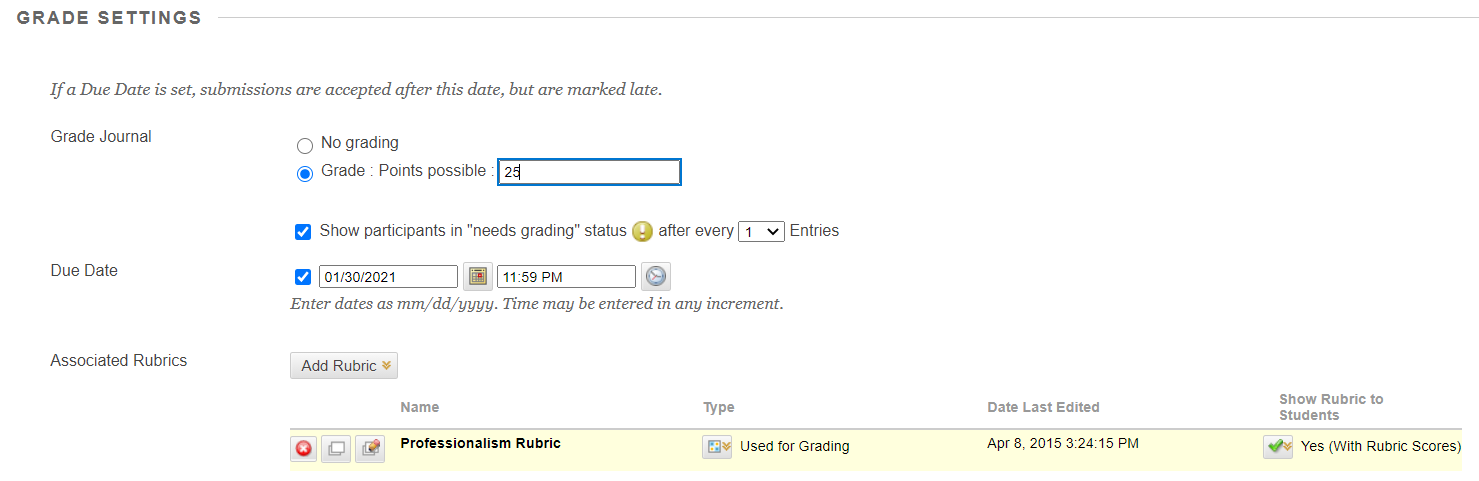
Step 7: In the Grade Settings section, select No grading or the Grade option.
For the Graded option type the number of Points possible. Optionally, you can customize when you see needs grading icon, enter a due date and add a rubric.
Step 8: Click Submit to save your customizations.